Calling an international number
9-011-international number
8-011-international number
9-011-90-532-NNN NN NN
Monday, January 14, 2013
Tuesday, July 10, 2012
IBM Lotus notes calendar
This is a great tool to synchronize your IBM Lotus Notes calendar with your Google calendar.
http://sourceforge.net/projects/lntogoogle/
Then go to this address and decide which calendars to synchronize on your iPhone
https://www.google.com/calendar/iphoneselect
http://m.google.com/sync
http://sourceforge.net/projects/lntogoogle/
Then go to this address and decide which calendars to synchronize on your iPhone
https://www.google.com/calendar/iphoneselect
http://m.google.com/sync
Thursday, April 12, 2012
Thursday, July 7, 2011
Install OpenCV on iPhone for development
http://niw.at/articles/2009/03/14/using-opencv-on-iphone/en
during installation of homebrew use the link
ruby -e "$(curl -fsSL http://www.boxcryptor.com/homebrew-install)"
instead
Thursday, June 10, 2010
Use Multi-Byte Character Set
I recently got this error
error C2664: 'InternetOpenW' : cannot convert parameter 1 from 'const char [10]' to 'LPCWSTR'
when I was trying to compile/build my source code including web.cpp and web.h. Later comparing my old setting with the new ones I realized that I solved it using the project properties.
Right Clik on Project name > Properties > Configuration Properties > Character Set should be chosen as "Use Multi-Byte Character Set"
Tuesday, June 8, 2010
How to Install OpenCV 2.1 on your Windows using Cmake GUI


Download “OpenCV-2.1.0-win.zip” and extract it to “C:\Program Files\OpenCV\OpenCV210”. This folder now should include subfolders like
- C:\Program Files\OpenCV\OpenCV210\3rdparty
- C:\Program Files\OpenCV\OpenCV210\apps
- C:\Program Files\OpenCV\OpenCV210\data
- C:\Program Files\OpenCV\OpenCV210\utils
- And also should include CmakeLists.txt, (C:\Program Files\OpenCV\OpenCV210\CmakeLists.txt)
Download “cmake-2.8.1-win32-x86.exe” and install Cmake GUI.
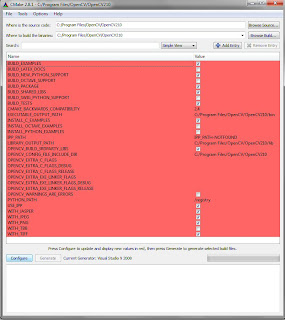
- Where is the source code? > C:\Program Files\OpenCV\OpenCV210\
- Where to build the binaries? > C:\Program Files\OpenCV\OpenCV210\
- Library files (C:\Program Files\OpenCV\OpenCV210\lib) and Binaries (C:\Program Files\OpenCV\OpenCV210\bin) are going to be put in corresponding folders.
- Click “Configure” for a second time and the red lines will turn white. Then click on “Generate”.
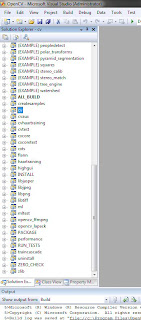
- “OpenCV.sln” will be put in C:\Program Files\OpenCV\OpenCV210\.
Monday, April 19, 2010
Install OpenCV 2.1 for Microsoft Visual Studio 2008
Install OpenCV:
- Download the OpenCV 2.1.0 Windows installer from SourceForge - "OpenCV-2.1.0-win32-vs2008.exe".
- Install it to a folder, say "C:\Program Files\OpenCV\OpenCV210\". This article will refer to this path as $openCVDir
- During installation check the option to add it to your Current User PATH
Configure Visual Studio:
- Open VC++ Directories configuration: Tools > Options > Projects and Solutions > VC++ Directories
- Choose "Show directories for: Include files" then Add "$openCVDir\include\opencv"
- Choose "Show directories for: Library files" then Add "$openCVDir\lib" (*.lib and *.dll files)
- Choose "Show directories for: Source files"
Add "$openCVDir\src\cv"
Add "$openCVDir\src\cvaux"
Add "$openCVDir\src\cxcore"
Add "$openCVDir\src\highgui"
Configure your Project:
After you've created a project you'll need to add the OpenCV dependencies.
Open Project Properties: Project > %projectName% Properties...
Open Linker Input properties: Configuration Properties > Linker > Input
Open the "..." window to edit "Additional Dependencies" and on each line put:
"cv210.lib"
"cxcore210.lib"
"highgui210.lib"
"ml210.lib"
"opencv_ffmpeg210.lib"
And any other lib file necessary for your project
Your project should now build. If you get any errors try restarting Visual Studio and then doing a clean Rebuild.
Subscribe to:
Posts (Atom)
